So you got yourself a travel trailer! Surely you are excited about all the family adventures you will get to enjoy.
But you are also probably wondering how you can organize your kitchen cabinets. It can seem like a daunting task at first!
If you are handy, you can implement lots of cool modifications! But if you are anything like me, I want practical solutions that anyone can do.
If you would like to learn how to quickly and easily organize your tiny camper kitchen, then this article is for you!
This post may contain affiliate links. Visit the Disclaimer page for more information.
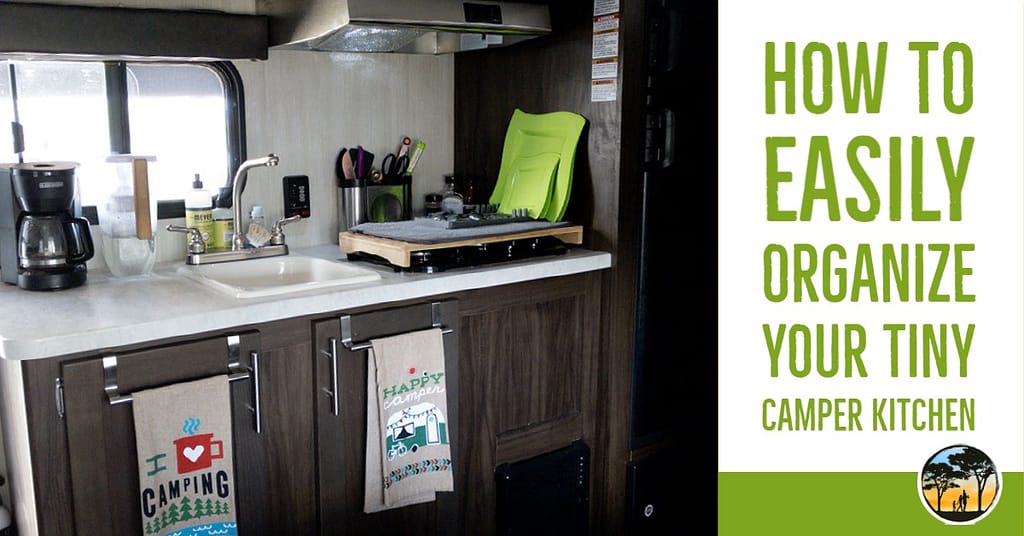
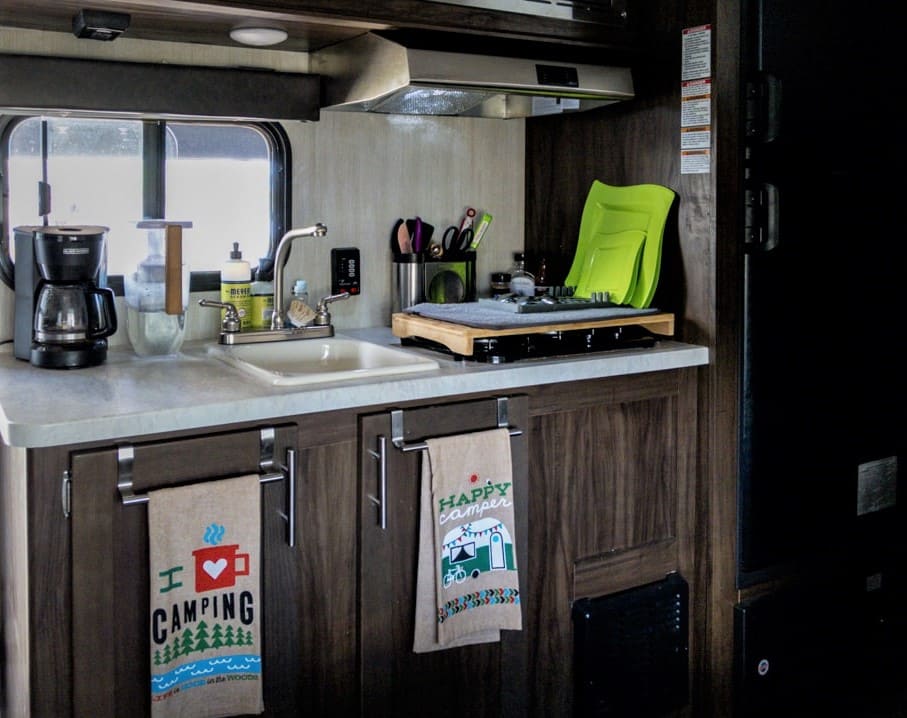
Easy Camper Kitchen Organization Ideas
Organizer box for flatware
While you could use a regular flatware organizer, one thing I required was to have a box that I could completely close. Why? Because we do not use the camper for weeks at a time. I certainly want to make sure I do not have critters walking all over out utensils!
You can use a dedicated flatware organizer like this one. In our case, I used an organizer box like this one because it is what we had on hand. I simply arranged the dividers to fit our flatware and small utensils.
What I also like about a box like this is that I can store it vertically! It is also easy enough to carry for those times we will be doing tent camping.
Non-Slip Shelf Liner
I do not use these at home because I do not need them there. But for the camper kitchen? These will be your best friend.
Seriously.
These liners are very effective at keeping items in place, particularly during transit. They will also make it easy to store items vertically!
You can find them at many stores and even dollar stores. Here is an Amazon link for shelf liners in case you do not feel like looking for these.
Use Square Dishes
I had these plastic square dishes from a party a few years ago, and I have loved them for camping. They are lightweight, washable, and SO EASY to store. Because they are square, I can simply store them vertically against the side of the cabinet on the non-slip shelf liner. In this configuration, they never move and take very little cabinet space!
While I will probably wait until the plastic ones give out, I have been looking at these melamine square dishes as well as these Corelle square dishes for when it is time to upgrade. The melamine dishes do not break, but are not microwave safe and are a bit heavy. The Corelle ones are supposed to be resistant, lightweight, and microwave-safe.
If you are not a fan of square dishes, I would still suggest you store them vertically by placing them in a shoebox or a plate organizer like this one.
Related: RV Kitchen Accessories for your New RV
Underwear Drawer Organizer…for drinking cups!
This may seem a bit crazy, but I have been using the rectangular underwear drawer organizer to store my drinking cups. It works great because it keeps them all nice and snug in place. I never have any issues with cups rolling around!
The only downside is that cups only fit facing up. I would prefer having the cups facing down to reduce the chance of critters crawling around.
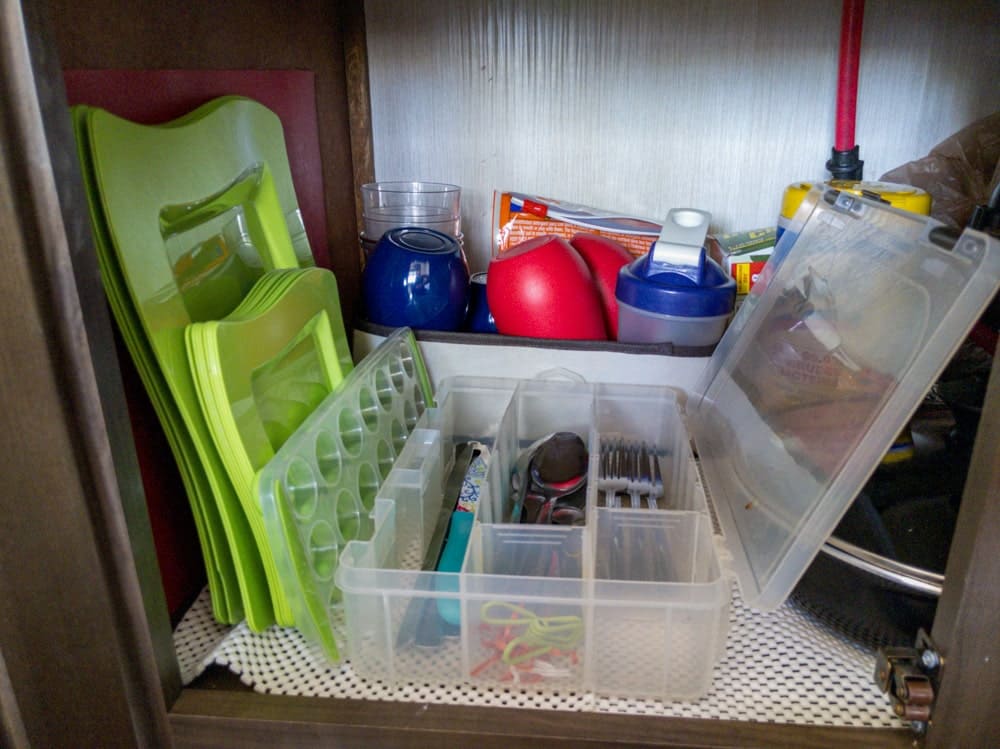
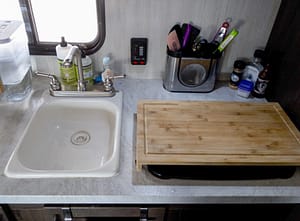
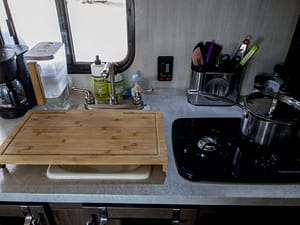
Thin Cutting Board
These thin cutting boards are perfect for campers. While I am not a fan of these as cutting boards, they offer a great food prep area that is very easy to wash and even easier to store! I store these vertically behind the dishes.

Cutting Board with “Feet”
I know some campers already come with a cover for the stovetop to increase counter space. My camper did not come with one, and honestly, I did not want it anyway. They seem a bit cumbersome when you need to use the stove.
Instead, I use this large, elevated cutting board and added rubber feet to make it stand above the stovetop. When it is time to cook, I can move it over the sink or place it over the dining table. Either way, it results in added food prep counter space!
I have loved this solution, and hopefully, you will find it useful too! For a more elegant solution than mine, you can buy this cutting board with adjustable feet, making sure the dimensions will work for your stove.
Thin Utensil Holder
One thing I have learned when looking into space-saving solutions is that round or circular shapes are not efficient. This is especially the case when organizing your camper kitchen.
Rectangular or oval utensil holders take little space behind the stove and are also easy to store in the cabinet during transit. I cannot find online the one I have been using, which is a shame. What I like about mine is that the middle compartment is shallow. This way, I can put smaller utensils that would otherwise get lost in the deep compartments. I will try to find it, but in the meantime, you can check this oval organizer or this rectangular organizer.
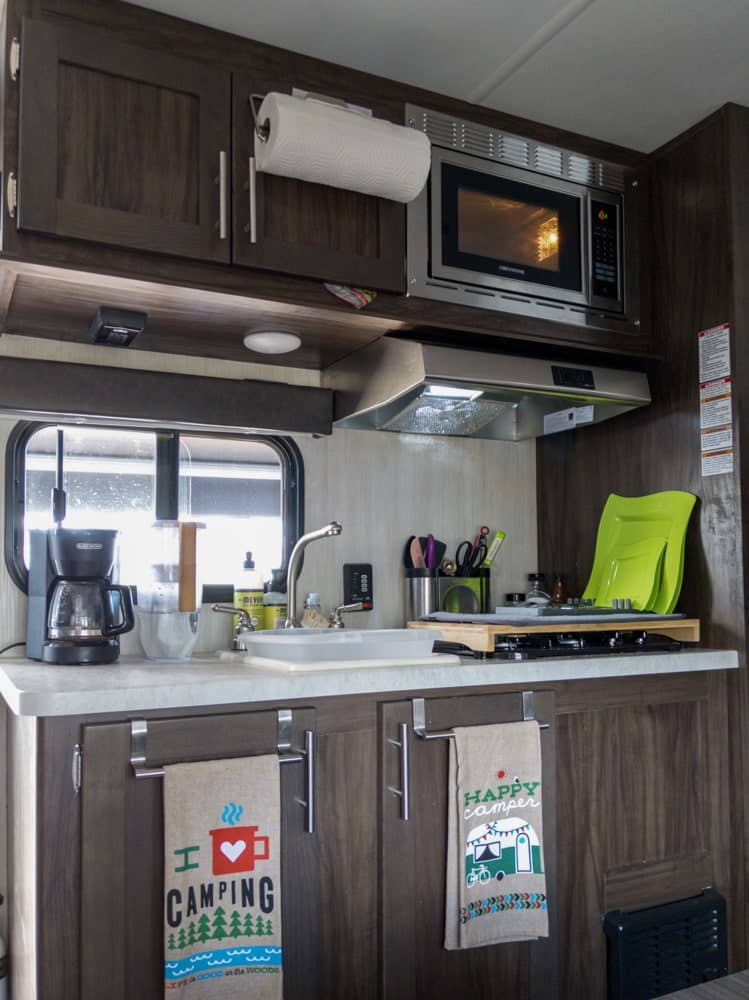
Over the Door solutions.
Most people know and use these over-the-door towel holders. I do as well, although at the moment they hold decorative towels. One item that was new to me is this paper towel holder. It keeps the paper towels dry and easily accessible, without taking any more precious counter space!
Related: RV Departure Checklist to get on the road!
Dish Drying Mat
While this is not directly related to camper kitchen organization, it is important to choose the right one for space-saving purposes.
I had a difficult time deciding what to get to dry the dishes. There are multiple options, and you will need to decide what works for your space. I chose ( and love!) this drying mat with low profile rack that I can easily fold and store in my cabinets. When it is time to dry dishes, I lay it over the large cutting board. It works very well for our small space!
Other options I considered closely were this collapsible rack and this small dish drying rack that fits inside most camper sinks. The reason I did not go for those is that I found the mat much easier to store and clean!
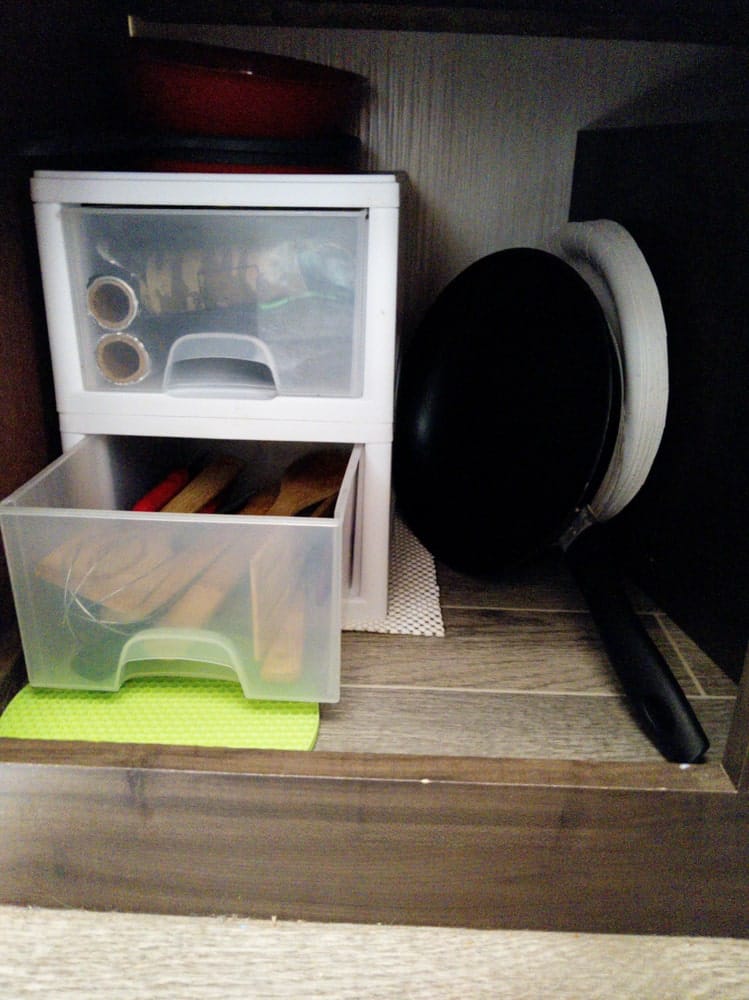
Stackable Drawers
I bought these stackable drawers when I made my DIY camping chuck box, and I love how well these work for kitchen cabinet organization. These 6-qt sizes are just a bit larger than a shoebox and are long enough that I can fit long kitchen utensils and even foil paper rolls.
I stacked two drawers on the bottom cabinet over the non-slip shelf liner. In that configuration, these drawers have not moved an inch in a year or frequent camping, so this configuration works great for transit!
The Challenge
Most RVs and travel trailers will have cabinets to store your food and kitchen items. However, a quick glance will show you that you will need to be smart about how you will organize your items.
Sure, you can just shove everything in and it may all somehow fit! But it may not be fully functional or convenient when it is time to get cooking!
The other issue is that I try to minimize weight, particularly in the upper cabinets. The last thing I want is for heavy items to fall off during transit!
Related: 37 Best gifts for Campers
Why not just use command hooks for everything?
One issue is that many solutions I have seen online involve using command hooks. This is always tempting because I LOVE command hooks.
Yet, I am not terribly comfortable doing this in my camper. Why? Because the wallpaper and cabinet material does not seem appropriate for those adhesives. The last thing I want is for one of those to come off and damage my wallpaper!
The other option is to use nails or screws. This is a great option for people that are handy and comfortable making custom adjustments. That is not our arena, and I am still hesitant to do permanent damage to our travel trailer.
For that reason, I came up with a few practical solutions that do not involve using adhesives or screws.
These solutions work well for our family of four. I have been able to comfortably cook and organize our kitchen for up to 8 days. We have not traveled longer than that due to work and school, but I am sure our kitchen would serve us well for many more days.
Even if later on you decide to implement more permanent solutions, these few tips will help you get started on your camper journey with little effort!
Last General Organization Tips
- Avoid round shapes – I think by now you have noticed by now that I use a lot of rectangular or square shapes. That is because round shapes are not great for storage! Don’t believe me? Then listen to what Marie Kondo has to say about this.
- Use vertical storage – I try to store things vertically as much as possible. It saves quite a bit of space while keeping items easily accessible. Storing items on top of each other makes it more difficult to access the items on the bottom.
- Have enough for your family – While it may be tempting to have a ton of dishes and cup, try to only keep the items you need for your family. Yes, you may have visitors every once in a while. Those are the times I break out paper plates. Other than that, I only have enough plates and utensils for us four.
- Choose lightweight materials – I know camper cabinets are designed to hold a good amount of weight, but I would rather not test it. After all, they are submitted to mild earthquakes each time we go through uneven ground or potholes.
Related: The Best RV Battery for Dry Camping – A Buyer’s Guide
Summary
There are many other permanent and custom organization ideas you can implement to organize your kitchen. Here, I wanted to share easy tips to get you started. These tips are all that I have been using for our family of four for the past year, and we have not modified anything so far.
I hope these practical tips can also help you get your camper kitchen organized quickly and ready for the road!
Do you have other ideas that I have missed? Let me know in the comments below!


Well we all know that moisture can kill your camper. To let my dishes drain I found everything took to long to dry. I put my dish rack on a dog wee wee pad. And just throw it away. Nothing to wash nothing to dry
I agree! Living in Florida, fighting against humidity is certainly a chore. As we camp quite frequently, I tend to avoid disposable items unless we have large gatherings. Everything we use is reusable to reduce waste! As for humidity, if dishes are not dry by the time we store the camper I dry them using cheap flour sack towels. As for the drying pad, I always take it out of the camper and wash it alongside towels and sheets!
This was such a helpful guide! We just bought our first travel trailer and I’ve been a little uncertain about how to organize with so little space. Thank you for all the great ideas, tips, and links!