If you have recently purchased a new RV or camper, you are probably becoming a bit overwhelmed with all the camper supplies you will need to purchase to get it going.
And I will not lie. You do need a lot of stuff.
If you were hoping that RVing would be a simple and cheap mode of travel, well, it isn’t.
Not if you want to do it properly and safely, anyway.
For that reason, a series of articles to get you started on your RV journey.
In this first article, I will cover the RV Accessories Must-Haves. These are the items that you need to get on the road safely, level your camper, and set up your utilities.
Make sure you also check out the kitchen, bathroom, and bedding essentials for your RV!
I am working on other articles covering the RV accessories for kids and pets, and outdoor accessories that you will need for your camping trip. If you are interested in learning about those, you can subscribe to receive updates and a FREE RV Departure Checklist!
This post may contain affiliate links. Visit the Disclaimer page for more information.
On The Road
General Road Supplies
RV GPS
I am sure you are counting on using Google Maps. Indeed, it is what we generally use for directions. However, will not take into account the size of your rig. As a consequence, it may end up sending you down roads that are too windy, too narrow, and simply difficult to navigate.

With an RV specific GPA, you are able to input the dimensions of your rig to ensure the roads are suitable. Also, this GPS comes preloaded with RV parks, and you can also connect it to your smartphone for other features.
Full disclaimer here, this is not a purchase we have made. Our camper is on the smaller side, and living in Florida we usually do not have issues finding our way around. However, if we owned a long and tall fifth-wheel or a motorhome, this is certainly a purchase worth making to keep ourselves from getting stuck!
Spare Tire
It may seem crazy, but I recently learned that a lot of motorhomes do not include a spare tire. Make sure you take care of this very important safety item before hitting the road!
And while you are at it, make sure your RV or travel trailer comes with good quality tires. Often times, manufacturers will load their campers with poor quality tires to save money, which results in a blowout while driving at 60mph on the highway
…We know this from experience.
Air compressor
We recently had our first instance of a blown-out tire on the highway. Luckily, we had our spare in good condition, and a good air compressor to save the day.

While you might be able to get away with a regular compressor, you should consider purchasing an RV specific compressor. The reason is that they come equipped with long air hoses and power cables to reach the tires of your RV. Also, RV tires can require higher PSI than regular car tires. Some compressors may not be rated for that.
Jack
For RVs or travel trailers with tandem axles, the easiest way to change a tire is to move your rig up a changing ramp like this one.
For single axle trailers, then you will obviously need a jack. Usually, the jack you would use for your towing vehicle will suffice!

Good Sams Roadside Assistance
While changing your own tire is certainly doable, if you want true peace of mind, make sure you get yourself into the Good Sams Roadside Assistance program. Their programs include coverage for travel trailers, autos, towing services (within the US), flat tire repair service, and more!
Over 500,000 Customers Trust Good Sam Roadside Assistance! Plans Starting at $49.95! Learn more!Towing a Trailer
If you purchased a travel trailer, or you wish to tow a small utility or storage trailer behind your RV, these are the items you will need.
Weight Distribution Hitch
When pulling a trailer, you will be putting a ton of weight on the back axle of your vehicle.
A weight distribution hitch uses a system of tension and springs to effectively distribute the tongue weight over your towing vehicle and trailer axles.
Better weight distribution will reduce wear and tear on your towing vehicle. More importantly, weight distribution hitches increase safety by reducing sway.
However, you will probably also need sway bars…
Sway bars
We thought we would not need sway bars. Our camper is about half-way under the towing capacity of our truck.
Yet, the moment we took our camper out of the dealer and on the highway, well, we learned differently.
Enter crosswinds and large semis creating different areas of high and low pressure on the highway.
Let me tell you…
Few things are scarier than feeling your truck being pulled by the trailer in and out of the lane without control.
The good news is you can find systems that integrate weight distribution hitches and sway bars.
The bad news is, they are not cheap…
I mean, you can find cheaper ones, but this is a safety item. A good system will help prevent a major accident.
As a family, road safety is a priority.
We use this Husky Centerline TS system. Our dealer installed it for us, but there are YouTube videos explaining how to do it yourself. We did not feel comfortable with it, so we decided to let the professionals handle this important job

Related: 5 Best Dry Camping Travel Trailers
Trailer brake controller
Still talking about safety here.
Most modern trailers come with their own brakes. However, you need to have a way to control and synchronize with your vehicle brakes.
This means that when you slam your brakes, your trailer will brake too instead of pushing your vehicle or swinging forward.
A brake controller, as the name says, does just that!
Keep in mind that when you need to reverse your camper, you will need to turn it off.
Towing a Fifth-Wheel
Fifth-Wheel Hitch
If you are going the route of a fifth-wheel, which provides better weight distribution over your truck’s axles, you will need a fifth-wheel hitch.
I cannot recommend a specific one because choosing the right hitch will depend on your truck and your camper.
Needless to say, the proper installation of the hitch is also of paramount importance.
For those reasons, I highly recommend you check with the fifth-wheel manufacturer or your dealer as to what your best options are for purchasing and installation.
Trailer brake controller
Just like with the travel trailer, controlling the brakes of your fifth wheel from your truck is a major safety step.
Not only will it reduce the chances of getting in an accident, but will also reduce wearing down your truck brakes!
At the Campground
Parking and Securing your Camper
Wheel chocks
This is such a simple item that can prevent major disasters, particularly with travel trailers and fifth-wheels.
These wheel chocks will keep your trailer from rolling away when you unhook your towing vehicle.

Simply place them around your tires (on the side that it not on levelers; more on that below) and keep them there until you are hooked back to your towing vehicle.
Just remember to remove them before you drive away…
Related: Best Gifts for Campers
Levelers
It is very important that your camper is completely level. This ensures proper functioning of your appliances, and prevents any accidents or damage to slide-outs if you have them.
Sadly, it happens often that campsites are not as level as they should be.
Unless your camper comes equipped with a self-leveling system, you will need to bring one of the sides up higher.
There are multiple systems on the market for this.
If you have a popup camper or tent trailer, you could get away with a BAL Leveler. We used this when we had our popup and it made leveling so much easier! It is great to get fine-level adjustments.

However, these levelers have a relatively low weight capacity (~2,000lbs) and fit smaller tires (up to 15in), so they will not work on larger rigs.
For small adjustments, you may be able to get away with propping one side on 2×6 wooden blocks that you can cut at home depot or lowes. Just make sure you are not pinching your tires.
If you need more height or for better fine-tuning, these Beach Lane levelers are your best bet. They come in packs of two and a non-slip mat is included, which is great for gravel sites.

The last recommendation I can make here, based on their popularity and the fact that I see them everywhere we camp, are these Lego-looking leveling blocks. They are nice because you can set them up in any configuration you need, and they are actually quite cheap!
As a safety measure, we always place wheel chocks on the side of the trailer that is not propped.
Level
Of course, before you even embark on all of the leveling work, you will want to know if your camper is level in the first place.
Make sure you at least have a simple level like this one, or you can also attach this Camco T-level Assist to your camper.

A few 2×6 Pieces of wood
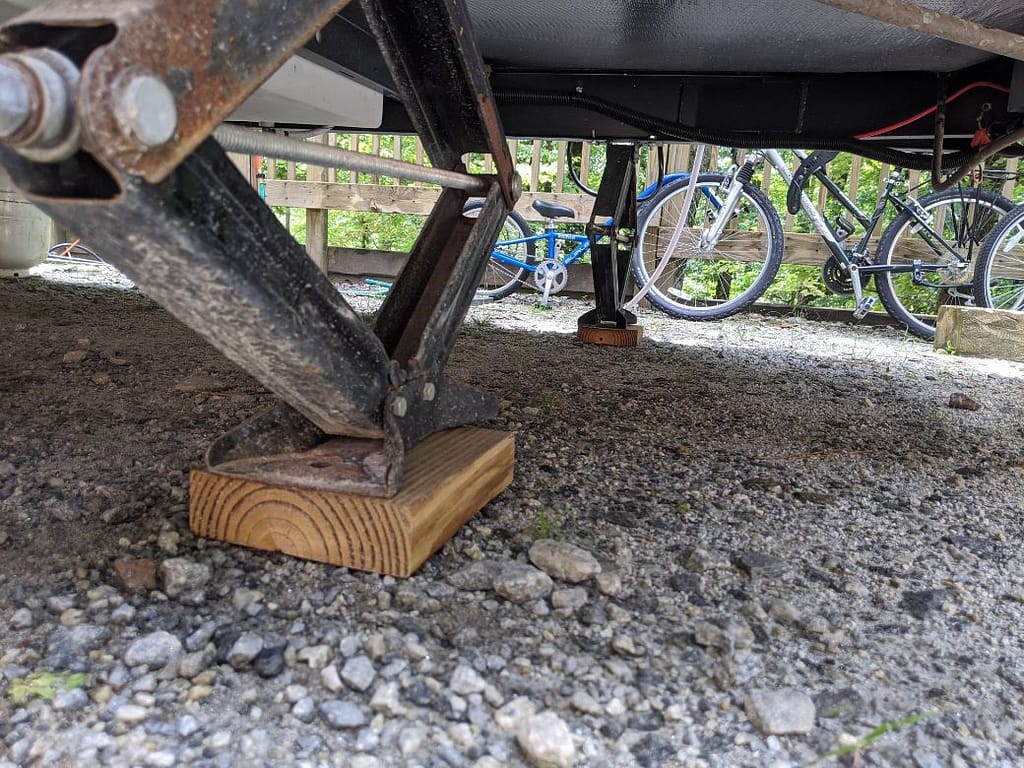
Such a cheap piece of equipment that you can purchase and cut at any home improvement store or your own garage…
We like to use these under our trailer jacks, and under our trailer tongue. They provide a better contact surface, which improves the stability of your trailer.
As I mentioned previously, you can also use these pieces to level your camper if the adjustments needed are small!
Jack adaptor for drill
After you level your camper, you may need to lower the jacks to stabilize it. Yet, this can be annoying doing by hand!
The easy solution is to use a cordless drill with a properly-fitting RV jack adaptor. Using your drill to lower your jacks will significantly cut down the time of stabilizing your camper. Please make sure you choose the correct size for your jacks!
A few more parking and leveling tips:
- Always level your camper first before putting down the stabilizing jacks.
- Do not open any slideouts until your rig is completely level and stabilized.
Related: RV Departure Checklist to Get on the Road Safely
Water Connections
Water pressure regulator
One thing that will be quite different from one campground to another is water pressure. While low pressure is annoying, it is not going to damage your RV plumbing.
If, however, you are in a campground with very high pressure, that is a different story!
For the most part, RVs need to keep the pressure lower than 60 PSI. Anything higher than that risks bursting your pipes and damaging your appliances.
Fortunately, water pressure regulators are not expensive. I would suggest you at least have a simple one with a gauge, like this Camco Water Pressure Regulator, so that you can monitor the pressure going into your rig. one so that

Water Connector Splitter
Some campgrounds will have dual spigots, and some will not. This is information I add in my campground reviews, but unless you read such reviews, you will not know if that it the case.
And maybe this is not important for you! But for us, we like having access to water outside the RV. A water connection splitter is a small investment that adds convenience to our setup. We attach a short piece of garden hose to it and use it to rinse out equipment, for example.
Water filter
For some reason, it has been my experience that water coming out of campgrounds is white…
Actually, it is usually from microbubbles and, once they dissolve, water is back to clear.
Still, I prefer to have a way to keep the water going into our camper nice and clean.
Again, this is a small purchase that will improve the quality and taste of your water. We like this Camco filter because it includes a hose protector to minimize strain in the connections.
You may have noticed I recommend a lot of Camco products. I do not have a partnership with them. They simply have a large repertoire of camper products and have been in the business for many years.

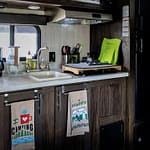
Related: How to Easily Organize your Tiny Camper Kitchen
Water Hose
Please do not use a garden hose for your drinking water. We tried that because we were trying to stay cheap.
Goodness. That metallic taste would take your breath away! And, simply put, garden hoses are not rated for drinking.
Get yourself a drinking hose. This Camco drinking hose is 10ft long, which is rather short but works for our small camper. We purchased two, and I recommend you do the same, especially for shorter hoses. You have no clue how far the water connection will be, and having two will reduce any potential issues with reach.
If your RV is large then purchase a longer hose. You may need to get some measurements from your RV to have a better idea of what you will need.
Hose 90 Degree Elbow
The last product I recommend for your water connections is the 90-degree elbow. This will keep your hose from bending when going into your RV, eliminating potential interruptions in water flow, and making your hose last longer.
Power Supplies
Power cable
The whole idea of an RV is to have comfort amenities inside, including AC and a fridge.
To make those work out of electricity, then you obviously need a power cord.
Again, consider the size of your RV when choosing a length, and also consider having a second one in hand for when you need the additional distance.
Surge protector

At $200 or more, this is not a cheap investment; however, it is definitely a worthy one.
A power surge can kill your RV electrical system, resulting in a ruined camping vacation and a trip to the service department.
Which surge protector will work for you depends on your rig’s amperage needs, so make sure you know your RV specs before purchasing a 50 amp or a 30 amp surge protector.
Battery Kill Switch
A battery kill switch is not quite an essential investment, but a cheap one.
This switch completely disconnects your RV battery while your camper is in storage. This way, you will not need to worry about a drained battery the next time you go on a trip!
Related: The Best RV Battery for Dry Camping – A Buyer’s Guide
The Potty Business
Sewer hose
Just as with drinking water hose and electrical cords, you want to get some RV measures to see the length of sewer hose you will need. You may need just one long one or may want to have a couple.

If your rig has two bathrooms, then you will obviously need at least two hoses and a wye fitting to connect them.
Also, while sewer hoses are pretty standard in their diameter, make sure you still check the diameter of your valves to confirm you get the right sized hose.
Sewer Hose Support
A sewer hose support is certainly not a requirement, but it helps to keep your hose on a gradual decline to facilitate the flow of the good stuff.

Clear Elbow
A clear sewer hose elbow prevents kinks in the hose when connected to the dump tank.
And as gross as it may be to see the contents of your tanks, you want it to be clear.
When you are done camping, you want to be able to flush out your tanks and your hose. The only way to know if you have done that effectively, is to be able to see the water coming out!

Black Tank Cleaner
No matter what you do, your holding tanks will get a bit, well, stinky. This is why it is important to have a good cleaner in place to deodorize your tanks.
In addition, one common issue with gray and black tanks is that the sensors that tell you their level get covered in gunk. This causes issues with the readings.
In order to fight the odors and dissolve the film that covers the sensors, you need a good enzymatic cleaner.
Concentrated holding tank treatments like this one can last a while (depending on the size of your tanks, of course). They are also specifically designed for RV holding tanks. Make sure you follow the directions of the treatment you decide to get.
Portable black tank
We waited a long time before getting a portable waste tank. We felt they were overpriced, and simply minimized using our tanks by showering in bathhouses and using campground sinks for the dishes.
This changed with the Covid-19 pandemic, as we decided we needed a way to stay in our campsite as much as possible and avoid public areas. While this is easy to accomplish when you have sewer connections, many state parks we go to do not have sewer hookups at each site.

For that reason, we decided to invest in this heavy-duty portable waste tank. It is well-designed, empties fast, it is easy to transport to the dump station by attaching to our truck’s ball hitch, and it is easy to clean!
A few tips for your holding tanks:
- Do not use household cleaners to clean inside your tanks. You may cause damage to the sensors.
- Keep the valves closed until tanks are about ⅔ full and it is time to dump. Do not just leave the valves open the whole time!
- Never put wipes of any kind in your tanks. You may clog your system, and I’ve seen what they do to dump stations…
- Use RV/Boat toilet paper. They dissolve much faster than regular toilet paper.
Final Words
Whew!
That’s a lot, isn’t it?
And all of this stuff is just to get your rig set up at your site! Remember to also look into kitchen, bathroom, and bedding essentials!
I will be writing in detail about these aspects in the next few posts, so if you would like to know when those posts go live, feel free to subscribe to get an email update (and a FREE RV Departure Checklist!). If you are already subscribed, I will let you know when those posts are ready.
I tried my best to include an exhaustive list, but there is always the chance I left something out. So, if you have a camper and feel I left something out, feel free to contact me or leave a comment below!


I appreciate you letting us know that most motorhomes don’t include a spare tire, so you should take care of this before leaving for the road to avoid future problems. I’m borrowing my cousin’s RV to go on a road trip with friends next weekend, and I’m currently taking care of everything we’ll need for the trip. I’ll be sure to keep this in mind when I shop for the RV parts we’ll be needing in case of emergencies.